

Blog Detail
06
June
How To Install An Air Conditioner - Step by Step Guide
Installing an air conditioner properly ensures optimal performance and longevity. This manual offers a thorough, step-by-step procedure for installing split and window air conditioners. Whether you're a DIY enthusiast or a first-timer, Considering these thorough guidelines will assist you in achieving a successful installation. In the first few words, you'll find critical steps to install your AC unit effectively. Understanding the intricacies of AC installation, including site preparation, mounting, and connecting refrigerant lines, will enhance your ability to complete the task efficiently and Ensure optimal performance from your air conditioning equipment. Performance. Proper AC installation also prevents potential leaks and electrical faults, contributing to a longer lifespan for your unit and improved energy efficiency.
Selecting the Suitable Location for Your AC Unit
Selecting a suitable spot for your air conditioning unit is essential for its efficiency and performance. The placement affects airflow, cooling capacity, and overall comfort.
Consider Room Size and Layout
- Central Location:Positioning the unit in a central location ensures even cooling throughout the room. This helps maintain a consistent temperature and maximizes the unit's effectiveness.
- Avoid Corners:Installing the unit in a corner can obstruct airflow and reduce efficiency. Corners tend to create pockets of stagnant air, making it harder for the AC to circulate cool air evenly.
Avoid Direct Sunlight
- Shade:Install the unit in a shaded area to avoid overheating and working harder than necessary. Direct sunlight increases the unit's workload, leading to higher energy consumption and potential wear.
- Away from Heat Sources:Avoid placing the unit near ovens or heaters. Proximity to these sources can cause the AC to work harder to cool the space, reducing its efficiency.
Preparing the Installation Site
The installation location must be adequately prepared to avoid complications during the installation process.
Clear the Space
- Remove Obstructions: Clear the installation area of furniture and other items that may obstruct the process. This ensures a smooth and efficient installation without any interruptions.
- Access:Ensure enough space around the installation site to access tools and components quickly. Adequate space allows for easier maneuvering and adjustments during installation.
Gather the Necessary Tools and Materials
- Tools:Ensure you have a drill, screws, mounting brackets, and other necessary tools. Having the right tools on hand can prevent delays and complications.
- Materials:Prepare refrigerant lines, insulation tape, and other materials needed for the installation. Proper preparation ensures that you have everything required for a seamless installation.
Installing the Mounting Bracket
The mounting bracket is essential to keeping the AC unit securely in place.
Marking the Drilling Points
- Measurements:Measure and mark the wall accurately to ensure the bracket is level. Precise measurements help avoid misalignment, which can affect the unit's performance.
- Alignment:Use a level to confirm the bracket's alignment before drilling. Proper alignment ensures the unit operates efficiently and effectively.
Attaching the Bracket
- Drilling:Drill holes at the marked points and insert wall plugs for extra stability. Secure drilling provides a strong foundation for the bracket.
- Securing:Attach the bracket firmly to the wall using screws, ensuring it can support the weight of the AC unit. A secure bracket is essential for the safety and stability of the unit.
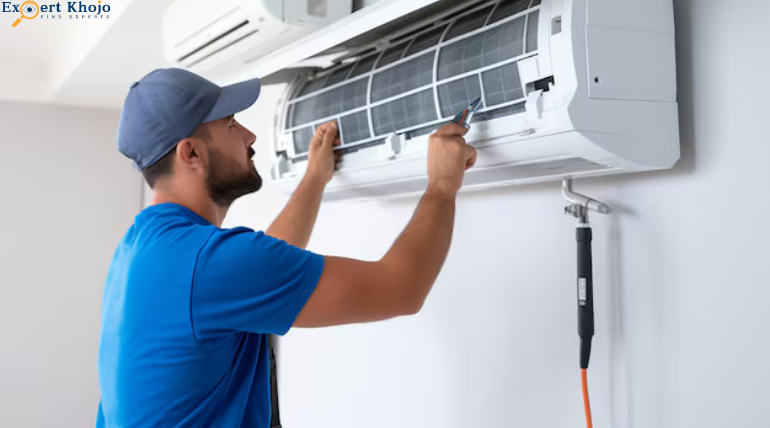
Mounting the Indoor Unit (for Split ACs)
The split AC's indoor unit must be positioned and secured correctly to ensure optimal operation.
Lifting and Placing the Unit
- Alignment:Align the indoor unit with the mounting bracket and hook it securely onto it. Proper alignment ensures efficient operation and prevents issues.
- Placement:Ensure the unit is level and positioned adequately for efficient cooling. A level unit distributes cool air evenly throughout the room.
Securing with Screws
- Stability:Tighten the screws to secure the unit in place, ensuring it does not wobble or shift. Stability is crucial for the unit's longevity and performance.
- Double-check:Verify the unit's stability to prevent future issues. Regular checks can help maintain the unit's efficiency and prevent malfunctions.
Installing the Outdoor Unit (for Split AC)
The outdoor unit of a split AC requires careful placement to ensure proper ventilation and cooling efficiency.
Choosing the Right Spot
- Airflow:Select a location with good airflow to allow the unit to operate efficiently. Adequate airflow prevents overheating and ensures optimal performance.
- Clearance:Ensure enough room around the unit to prevent obstructions. Clear space around the unit facilitates maintenance and improves efficiency.
Ensuring Stability and Ventilation
- Flat Surface:Place the unit on a flat surface or concrete pad to provide stability. A stable base prevents vibrations and noise.
- Ventilation: Maintain adequate ventilation around the unit to prevent overheating. Proper ventilation is crucial for the unit's cooling capacity and energy efficiency.
Connecting the Refrigerant Lines and Electrical Wiring
Correctly connecting the electrical wiring and refrigerant lines is essential for the AC unit's functionality.
Handling Refrigerant Lines
- Connections:Connect the indoor and outdoor units using refrigerant lines, ensuring tight and secure connections. Secure connections prevent leaks and provide efficient cooling.
- Torque Wrench: Use it to ensure the connections are secure and leak-free. Proper torque settings prevent damage to the lines and fittings.
Electrical Wiring Best Practices
- Wiring Diagram:To connect the electrical components correctly, follow the manufacturer's wiring diagram. Adhering to the diagram ensures safe and correct connections.
- Grounding: Ensure proper grounding of the unit to prevent electrical hazards. Proper grounding protects the unit and users from electrical shocks.
Testing the System
Testing the system after installation ensures that it is operating correctly and efficiently.
Checking for Leaks
- Inspection: Inspect refrigerant lines for any leaks using a leak detector or soapy water. Detecting and fixing leaks early prevents damage and inefficiency.
- Repair: Address any leaks immediately to prevent damage and inefficiency. Timely repairs maintain the unit's performance and longevity.
Ensuring Proper Functionality
- Thermostat: Turn on the system and set the thermostat to the desired temperature. Proper thermostat settings ensure comfortable and efficient cooling.
- Efficiency: Verify that the unit is cooling efficiently and maintaining the set temperature. Efficient cooling reduces energy consumption and improves comfort.
Sealing and Insulating Gaps (for Window AC)
Sealing and insulating gaps around a window AC unit improves energy efficiency and cooling performance.
Sealing Gaps Around the Unit
- Weatherstripping: Seal the openings between the unit and the window frame. Sealing gaps prevents air leakage and improves efficiency.
- Snug Fit:Ensure the unit fits snugly to prevent air leakage. A snug fit enhances cooling performance and energy efficiency.
Adding Insulation
- Sides and Top: Insulate the sides and top of the unit to prevent heat exchange and improve efficiency. Proper insulation reduces energy consumption and enhances cooling performance.
- Energy Savings:Proper insulation helps reduce energy consumption and enhances cooling performance. Energy-efficient cooling lowers utility bills and environmental impact.
Final Checks and Adjustments
Performing final checks and adjustments ensures the AC unit operates smoothly and efficiently.
Adjusting Settings
- Temperature: On the thermostat, set the desired temperature and fan speed. Proper settings ensure optimal comfort and efficiency.
- Remote Control:Make sure everything is working properly by testing the remote control. A functioning remote control allows easy adjustments and monitoring.
Performing a Final Inspection
- Connections: Inspect all connections and mounting components to ensure they are secure. Secure connections prevent issues and maintain performance.
- Loose Parts: Look for any tangled components or wires that may cause issues. Identifying and fixing loose parts ensures reliable operation.
Post-Installation Cleanup
Proper cleanup after installation ensures a neat and safe environment.
Removing Debris
- Packaging: Dispose of all packaging materials properly. Proper disposal keeps the area clean and prevents hazards.
- Clean Area: Clean the installation area to remove any dust or debris. A clean area enhances safety and aesthetics.
Proper Disposal of Packaging
- Recycle:Recycle packaging materials as per local guidelines. Recycling reduces waste and environmental impact.
- Leftover Parts: Ensure no leftover parts or tools are left around the installation site. Properly storing or disposing of parts maintains a tidy and safe environment.
Conclusion
Installing an air conditioner can be straightforward if you adhere to the instructions in this guide. Proper installation ensures efficient cooling and extends the life of your unit. If you encounter any difficulties, consider hiring a professional to assist with the installation. Your comfort and safety are paramount.
Beyond simply placing the unit and connecting the components, attention to detail in each step—from selecting the right location to performing final checks—ensures the effectiveness and dependability of your air conditioner. For example, providing the mounting bracket is secure, and all electrical connections are correctly made can prevent common issues such as vibrations, noise, and electrical hazards.
Additionally, understanding the importance of sealing and insulating gaps around a window AC unit can significantly improve energy efficiency, which will lower utility costs and impact the environment. Maintenance such as filter cleaning and inspecting refrigerant lines further contributes to the system's longevity and performance.
For those who prefer DIY projects, this guide provides the knowledge to undertake the task confidently. But keep in mind that hiring a professional installer ensures that all setup details are handled by knowledgeable specialists, adding to your piece of mind. Whether you install the air conditioner yourself or seek professional help, a well-installed air conditioning system will keep your residence cool for years.